
 US
US
 UK
UK



How to Make a
Custom Cardboard Box
Learn how to measure, score, cut and fold a custom cardboard box, choose the right flute and material, and know when DIY is enough versus when to go professional.

Emily Parker
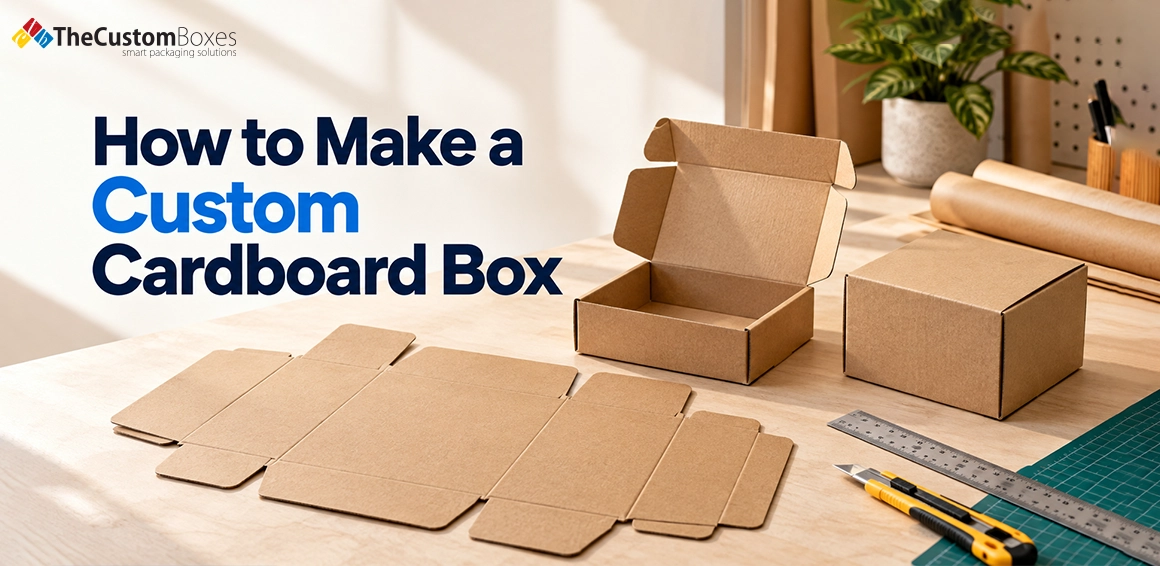
A cardboard box looks simple until the measurements go wrong. A panel that is slightly too short affects the whole structure. Poor scoring creates weak folds. The wrong board thickness may leave the product exposed during handling.
The initial rule for a fine custom cardboard box is to ensure that the measurements are correct, the right board is used, and the construction is right. For prototypes, storage, samples, crafts, or small projects that need a quick, useful solution, DIY boxes are a great option. Professional production offers more consistent structural accuracy, printing, and material control for retail or shipping orders.
This blog will take you on a journey to making your very own cardboard box. Materials and measurements, template, scoring, cutting, folding and finishing are explained. You will also gain knowledge about when to use DIY packaging and when to hire a packaging company to do it for you.
What Goes Into a Custom Cardboard Box?
A custom cardboard box is made to fit the product inside. It is designed around the product it contains. It will be used to fit the size, board, closure, and print depending on the use.
Corrugated is durable but not heavy, so it makes a convenient material for crafting and shipping. Boxes for retail can be produced from kraft paper, paperboard, chipboard or corrugated board. All options come with a combination of strength, style, and flexibility.
At The Custom Boxes Australia, packaging starts with the product requirements. Dimensions, folds, closures, and die lines are planned before production. This approach creates packaging that fits the product properly instead of relying on standard box sizes.
Materials and Tools You Actually Need
Cardboard of different types will impact the strength, look and assembly of the box.
Single-wall board: A good option for low-weight items and for basic packaging requirements.
Double-walled board: Provides added support for heavier products and those that require greater protection.
Metal ruler: Accurately measures and makes straight cuts.
Carpenter's square: Aids in the making of neat and accurate right angles.
Scissors: These are useful for thin cardboard, but a utility knife is better for thicker cardboard.
Scoring tool: A bone folder or scoring wheel is used to ensure that the fold lines are clean and do not damage the cardboard.
Pencil: Use to mark measurements, fold lines and cutting points prior to cutting.
Cutting mat: When cutting, it helps to prevent scratches and marks on the surface.
Adhesive tape: Choose a tape suitable for your type of cardboard and box design.




Which Flute Should You Choose?
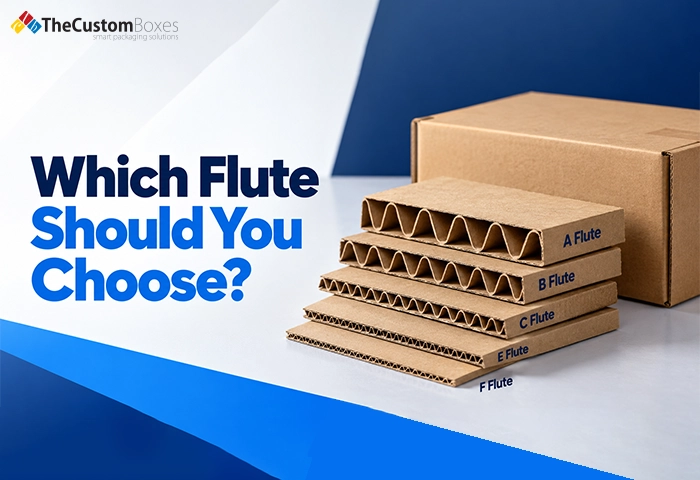
Corrugated board comes in different flute profiles. The right option depends on the product, appearance, and required protection.
|
Flute |
Typical Use |
Main Benefit |
|
E-flute |
Retail boxes and lighter products |
Thin profile and smooth printing surface |
|
B-flute |
Mailers and general packaging |
Balanced cushioning and strength |
|
C-flute |
Shipping and heavier products |
Greater cushioning and crush resistance |
For a handmade prototype, use a board that matches the final purpose. A small gift box does not need the same structure as a shipping carton.
Phase 1: Start With the Right Dimensions
- Before cutting cardboard, measure the product. Record its length, width, and height at the widest or tallest points.
- Do not design the box around the product's exact measurements. Allow room for insertion and protective materials.
- If the product is fragile, leave 1/8 to 1/4 inch of extra space around the product. If you will be adding padding or inserts, allow an additional inch or two for a good fit.
- For a basic rectangular box, the flat template needs enough material for every panel and the joining tab.
Basic flat length:
(2 × Length) + (2 × Width) + Glue Tab
The glue tab usually needs around 1–2 inches, depending on the box design and board thickness.
The other direction needs the box depth plus enough material for the top and bottom flaps.
Phase 2: Draw the Flat Box Template
- Place the cardboard on a flat surface.
- Be aware of the corrugation direction. For many shipping cartons, flute direction affects compression and stacking performance. The final orientation should match the box style and intended load.
- Mark the panels with a pencil and metal ruler.
- Start with the main body panels. Mark each fold line clearly. Add the glue tab along one outer edge.
- Next, mark the top and bottom flaps. Keep opposite flaps aligned so the box closes evenly.
- The template should form one connected shape rather than separate pieces.
Make the Template Easy to Read
- Use one pencil line for each fold. Mark cutting areas separately.
- Do not rush this stage. A small error in the template becomes a visible problem during assembly.
- For professional packaging, structural design follows the same principle. The difference is precision. The Custom Boxes Australia works through sizing, folding, locking, and die lines before production.
Phase 3: Cut and Score Without Damaging the Board
Now turn the flat drawing into a workable box.
First, protect your work surface. Place the cardboard on a self-healing cutting mat or suitable scrap board.
Score the Fold Lines
- Use a bone folder, scoring wheel, or another blunt scoring tool.
- Press along each fold line without cutting through the board.
- Scoring compresses the board along the fold. It creates a cleaner bend and helps prevent random cracking.
- Never cut through a fold line.
Cut the Outer Shape
- Use a sharp utility knife & metal ruler.
- Try to make controlled passes and not force the board with the blade. Replace dull blades when they start dragging or tearing the liner.
- Cut the outer perimeter first.
- Then remove the sections that do not belong to the finished box.
Create the Flap Slits
- Cut the vertical sections between the flaps. Each flap should move independently.
- Keep the cuts straight. Uneven flap edges affect the final closure.
Phase 4: Fold, Join, and Build the Box
- Once the template is cut, gently pre-fold every scored line.
- Do not force the board into position. Work along each crease until the panels move naturally.
- Start with the main body. Bring the side panel towards the glue tab.
- Spread glue on the tab evenly. Press the panels together and hold them tightly while they are bonding.
- For a temporary prototype, strong double-sided tape is convenient. Packaging tape works well for many shipping-style prototypes.
- Now form the bottom.
- Fold the smaller flaps inward first. Bring the larger flaps over them. Check that the corners meet cleanly.
- Press the bottom firmly.
- The box should stand square without leaning or twisting.
What Thickness Should a Cardboard Box Have?
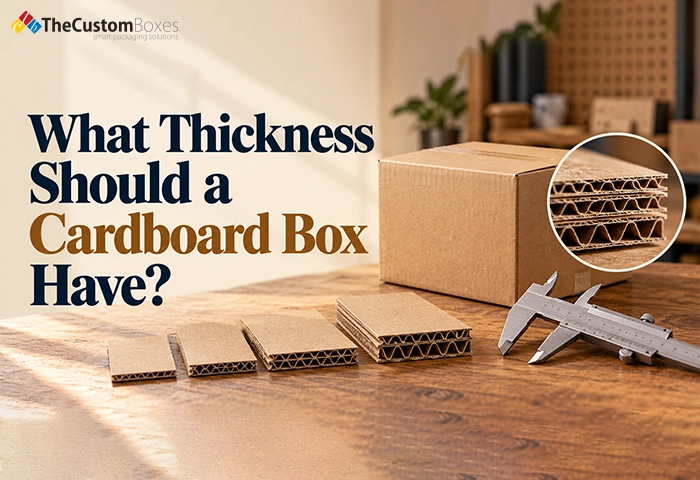
Thickness depends on the product and how the box will be handled. A lightweight retail item may suit thinner E-flute corrugated board. Products travelling through parcel networks often need a stronger B-flute or C-flute structure. Heavier products may require double-wall corrugated board.
Do not choose thickness based on appearance alone. Consider product weight, stacking, handling, transit distance, and internal protection. For premium presentation boxes, rigid boards provide a different feel and structure from corrugated shipping board.
Custom Boxes Australia has a variety of materials available, including E-flute, B-flute, C-flute, double-wall, kraft-faced recycled board, and FSC-certified virgin kraft.
Make It Stronger Without Making It Bulky
A strong box is not simply a thick box. Good structural design matters just as much. Keep the box close to the product's actual size. Use suitable flap dimensions. Align folds accurately.
Add inserts when the product needs internal support. For heavier shipping applications, double-wall construction provides additional board layers. For lighter retail packaging, a thinner flute may deliver enough strength while keeping the box neat. The goal is balance. You need enough protection without adding unnecessary material, weight, or space.
Add Custom Printing and Brand Details
A handmade prototype helps test the structure. A production box takes the idea much further. Professional DIY custom packaging concepts often move into custom printing once the structure is approved.
You might add:
- Brand colours
- Logo placement
- Product information
- Care instructions
- QR codes
- Interior artwork
- Promotional messages
- Special finishes
The Custom Boxes Australia offers custom sizes and styles, printed packaging, and design support. Its production process also covers structural design, graphic design, prototyping, and production management.
That matters when you need hundreds or thousands of identical boxes. If hand-cut, each unit takes a longer amount of time to create, and there are likely to be some variations between each unit.
Choose FSC-Certified and Recycled Materials
Material choice also affects your packaging story. The Custom Boxes Australia offers FSC-certified virgin kraft and recycled kraft-faced board options. These choices provide brands with packaging material options that suit different sustainability requirements.
FSC certification relates to responsible forest management and the certified sourcing chain. It should not be treated as a blanket claim that every component of a box is FSC certified.
Recycled board is another option when the product and strength requirements allow it. Australia's latest 2023–24 packaging data shows paper and paperboard represented more than half of packaging placed on the market. Its reported recovery rate was 66%.
Australia Packaging Snapshot
|
Measure |
Latest Reported Figure |
|
Wrapping reusable, recyclable or compostable |
86% |
|
Paper and paperboard share of packaging |
50%+ |
|
Paper and paperboard recovery rate |
66% |
|
Average recycled content across packaging |
44% |
|
Packaging consumption per person |
251 kg |
These figures show why material selection deserves attention. The recyclability of a box will depend on the design of the box, the local recycling facilities, and the materials of each component in the box packaging.
How Much Does a Custom Cardboard Box Cost?
The cost of making boxes by hand is estimated to be approximately A$2 - A$8 per box, depending on the cardboard, adhesive, and supplies used. Professional custom boxes often cost about A$1–A$4 per unit for larger orders. A simple 100-box order might range from A$150 to A$400, while 1,000 boxes may bring the unit cost closer to A$1–A$2.50.
These are general Australian budgeting estimates, not fixed prices from The Custom Boxes Australia. Your final cost depends on box size, material, thickness, quantity, printing, finishes, and structure. Our company takes custom cardboard box orders at 100 units and provides project-specific quotes.
Test the Box Before Using It
Put the actual product inside the finished prototype. Check the fit first. Then close the box and inspect every corner. Look for loose joins, weak folds, crushed edges, and excessive movement.
For shipping packaging, test the box under realistic handling conditions. A box that looks strong on a desk still needs to handle storage, movement, stacking, and transport. Professional packaging development adds another layer of control. The structural design, protocol and inspection of the finished product are done to guarantee that the final box meets the design objectives.
Final Thoughts
The first step to a good box is to get the measurements correct and the correct cardboard form. Score and cut each panel carefully, then assemble it with care. For larger orders, professional production offers consistent sizing, custom printing, and suitable materials for reliable packaging.
Looking for custom cardboard boxes for your products? Request an estimated quotation from The Custom Boxes Australia and select the dimensions, material, printed content and form of your packaging.
Premier American Manufacturer of Packaging and Custom Boxes
Experience the ease of creating and ordering custom boxes and affordable packaging online with the Custom Boxes. Contact us today to discover how we can turn your packaging vision into a reality.

Payment & Security
 No Hidden Charges
 Money Back Guarantee
thecustomboxes.com.au online guarantee the privacy of all the customers and never share their personal information with third parties. For more details read our Privacy Policy.


